If you’ve ever had water in your basement, you know that it’s a nightmare. A terrifying, expensive, messy, time-consuming nightmare. Fortunately, keeping rainwater away from your house has a pretty simple landscaping solution. It’s a bit of work, but it’s not hard to do, nor is it expensive. It also just happens to be one of my favorite projects.
Drain tile
There is absolutely nothing fancy about drain tile. It’s just a perforated, corrugated, plastic tubing. But knowing when and where to install it feels so smart! (And smart is sexy, so be ready to get your swagger on in those overalls!) If you’ve never seen or heard about drain tile before, I wouldn’t be surprised. Drain tile is hidden underground, secretly working to keep your structure safe. Out of sight, out of mind, right?

This post contains affiliate links.
When to use drain tile
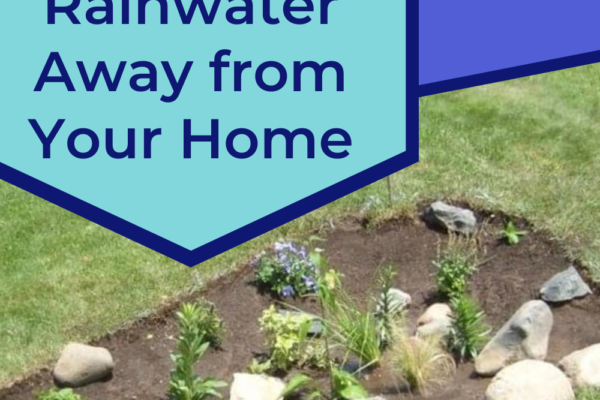
We use drain tile at the base of our downspouts which then flow into rain gardens. They’re a really lovely project that we’ve enjoyed tremendously over the years. But this spring we’re installing a gravel driveway for our camper and guess what? We need to install drain tile.
In this case, we’ll be installing drain tile because the new driveway will be built up with railroad ties and will block a low path between our backyard and the street. While chances are slim that water would ever make it to our house from that point in our yard, our yard would certainly hold water, and/or drain onto our neighbor’s property.
We like our neighbors. We don’t wanna be those people, so we’ll happily take the extra step.
Where to install drain tile
The key to identifying when and where to install drain tile is to:
- Observe/monitor your yard and identify low spots.
- Ensure low spots are a significant distance from your house (10+ feet) and have somewhere to properly drain to.
- Check to see if there are any spots where water could be trapped. (Retaining walls or landscaping pavers.) If creating one, consider installing drain tile for good measure.
Supplies
This project requires very few supplies and — compared to the cost of many projects — they’re fairly inexpensive. You’ll need:
- A catch basin – these come in various shapes and sizes.
- Select one that best suits your site. You can also use two to make a Y, if that design would better fit your project. (Eg. Install one circular catch basin at the bottom of a down spout with a second rectangular catch basin (sometimes called a channel or trench) along the edge of a porch within a landscaped area.) (Additionally, you should always leave alternate ways for water to escape areas near your home.)
- Drain tile – Just make sure that you buy enough length for your project.
- Drain grate – This will just ensure that no animals make themselves at home in your pipe and block it or put themselves in danger.
- And of course a shovel for digging – These trench digging ones are great for the job, but definitely not required.
How to install drain tile
The first thing you need to do is identify two things:
- your low spot(s). This is where you’ll place your catch basin.
- Where your water will drain to.
As I mentioned above, we’ve installed rain gardens around our property. They’re a simple, beautiful project and are a great option for residential areas. If you have a trench or pond you’d prefer to drain to, that’ll work well, too.
**Always be sure to call Digger’s Hotline to make sure you will not be interfering with any utilities.**
Dig
Once you’ve identified your low point, dig a hole deep enough for your catch basin plus a couple of inches for gravel. Make sure the top is level with the ground! You don’t want to bury it and risk it becoming blocked, nor have it sit above any prospective water.
After this is at a good level, lay and tamp your gravel at the bottom of your path to reduce settling. Continue to dig the trench in the direction of your drainage location. Consider marking your path so you don’t go off course. We recommend doing this with a string line.
By using a string line, you can then measure the distance between the line and bottom of the trench. We still recommend double checking with a long level to ensure that you are slowly but surely angling downward toward the destination. (It’s pretty easy to accidentally knock the string line as you dig.) Lay and tamp gravel as you go or wait until after your trench is dug in full.
String line
To set your string line, pound two stakes into the ground and run a string between them. You can then use a string line level to make sure that you’re properly grading away from your structure. (We recommend 2-3%, which puts your level bubble about halfway outside of the center lines.)
Always double check!
Before laying the drain tile, check your level along the route once again for good measure.
After laying your drain tile, replace the dirt and sod, cap the drain tile with the grate, and call it a day. Crack a cold one, if that’s your style!
Interested in having a more sustainable and low maintenance lawn? Check out this trending option!
Questions, comments, concerns? Put ‘em in the comments below. We’d love to hear from you!
— Ryan & Melissa, The Joneses Four


